Dans ce dernier article, je vais aborder les petits à-côtés qui ne peuvent pas faire partie de ma comparaison en tant que critère mesurable.
Je vais rapidement parler des interfaces graphiques, car pour certains utilisateurs, cela peut faire une grande différence. Les tailles des applications sont données pour la version macOS.
Des trois logiciels, c'est Restic qui a l'écosystème le plus riche et le moins mature en terme d'interfaces graphiques de gestion. Il en existe plusieurs, mais ce sont des projets indépendants plus ou moins en phase alpha ou beta, et qui n'assurent pas tous un niveau de fonctionnalités équivalent.
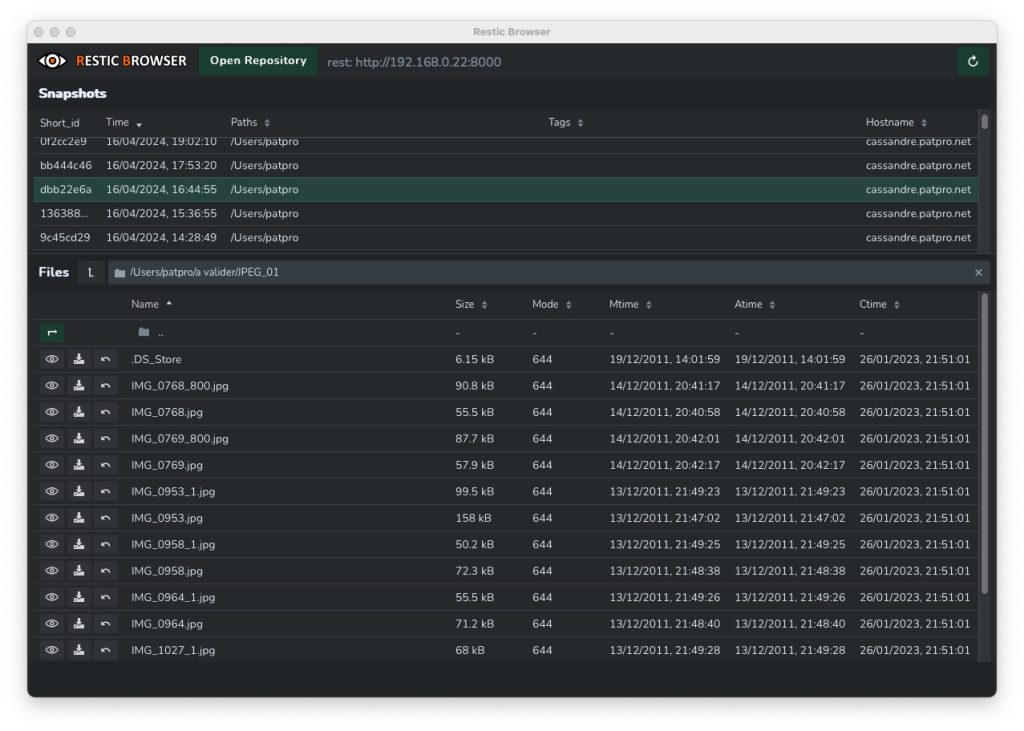
Je n'ai testé que Restic Browser. Cette interface graphique très légère (13 Mo) a pour unique vocation de permettre de naviguer dans les snapshots et de faire des restaurations de fichiers. Cette application fonctionne parfaitement, fait exactement ce qu'on attend d’elle. Rien à dire, si ce n'est que c'est un complément très agréable à un script de sauvegarde autonome qui tournerait sur la machine de l'utilisateur.
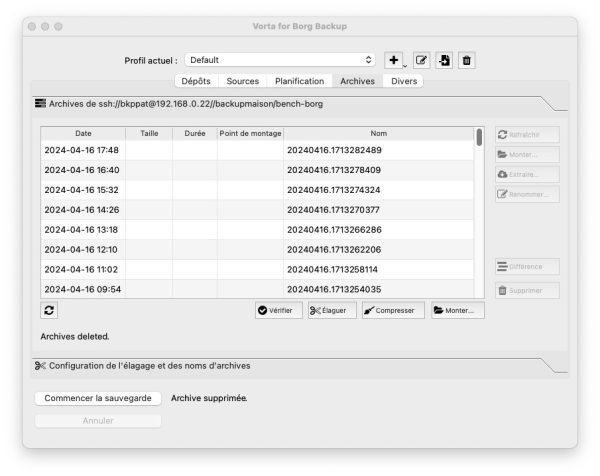
Le principal projet d'interface graphique autour de Borg s'appelle Vorta. C'est une application complète qui permet de configurer entièrement des sauvegardes avec planification, liste d'exclusions, paramètres de compression, etc. Ce logiciel pèse autour des 127 Mo mais dispose des fonctionnalités complètes (configuration, planification, nettoyage, restauration, vérification du dépôt, etc.). Sur macOS, il faudra juste installer les drivers Fuse pouvoir monter localement une archive distante. Comme Borg fonctionne sans fichier de configuration, ni stockage de sa configuration sur le dépôt, il est malheureusement impossible à Vorta de récupérer le paramétrage des sauvegardes qui sont faites à la ligne de commandes. Il peut néanmoins se connecter à un dépôt existant en lister les archives, faire des sauvegardes, des restaurations et toutes autres tâches. Il faut juste garder l'esprit que Vorta n’aura pas connaissance des paramètres que vous passez à Borg dans un éventuel script de sauvegarde. C'est donc un logiciel qui est plutôt adapté à une utilisation autonome : vous paramétrez vos sauvegardes/nettoyages directement dans Vorta, et c'est lui qui se charge de les réaliser.
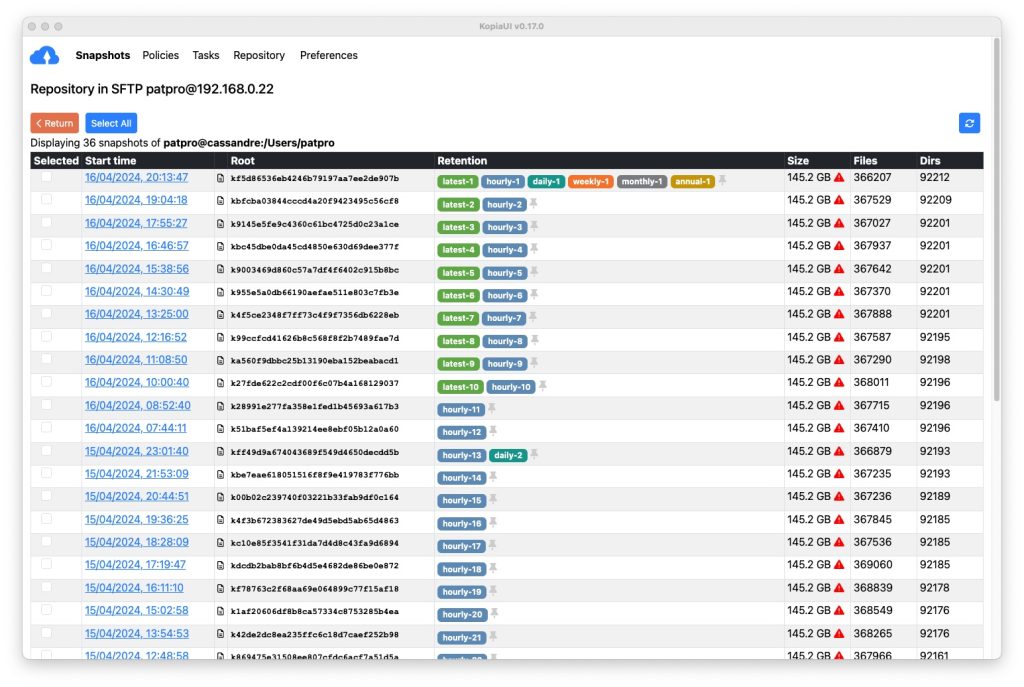
À l’inverse, Kopia propose une expérience de sauvegarde totalement unifiée entre son client en ligne de commande et son interface KopiaUI. L'ensemble des paramètres de sauvegarde de nettoyage etc. est configuré dans une politique accessible aux deux environnements. Il est donc possible de passer de la ligne de commande à l'interface graphique, sans se poser de questions. KopiaUI pèse tout de même 313 Mo tout en offrant des fonctionnalités beaucoup moins avancés que celle de Vorta. Impossible par exemple de lancer une tâche de vérification sur un snapshot, ou de faire une comparaison entre deux snapshots. Notez qu'il est possible d'afficher cette interface utilisateur sans même installer KopiaUI : en effet, Kopia en ligne de commande intègre un mode serveur qui permet d'afficher dans un navigateur Web exactement la même interface graphique.
Outre les interfaces graphiques, il existe des «wrappers» qui facilitent l'utilisation de Restic et Borg. Pour Kopia, ce type d'outils n'existe probablement pas, ou de manière totalement marginale, en raison de sa gestion intégrée des politiques de sauvegarde. Par contre Restic et Borg ne bénéficient pas de gestion de configuration complète et ces «wrappers» pour la ligne de commandes peuvent être d'une grande utilité. Je n'en ai pas testé pour Restic, j'utilise par contre depuis plusieurs années Borgmatic pour certaines de mes machines. Cet outil permet, au travers de fichiers YAML, de configurer l'intégralité des paramètres de sauvegarde, rétention etc.
Exemple d'utilisation :
@daily	borgmatic -v 1 create --files prune ; borgmatic list
0 2 16-23 * 2 borgmatic -v 1 check
0 2 16-23 * 3 borgmatic -v 1 compact
Les modes de fonctionnement serveur de kopia et REST-server de Restic permettent assez facilement de gérer un dépôt de sauvegardes multi-utilisateur. C'est un type de fonctionnement qu'il n'est pas trivial de reproduire avec Borg car ce dernier nécessite de fournir aux utilisateurs un accès SSH. Bien sûr cet accès SSH peut être limité (doit !), mais cela entraîne des complications de gestion qui vont bien au-delà d'un simple login et mot de passe comme pour Restic et Kopia.
En fonctionnement multi-utilisateurs Kopia est supérieur au REST-server. En effet, ce dernier ne permet la gestion des utilisateurs qu'au travers d'un fichier .htpasswd alors que Kopia fournit une gestion des utilisateurs et des autorisations d'accès de ces derniers plutôt élaborée. Je n'ai pas trouvé de mention dans la documentation de Restic de la capacité de ce dernier à partager la duplication lorsque plusieurs utilisateurs sauvegardant leurs données sur le même serveur. C'est par contre une fonctionnalité tout à fait officielle de Kopia en mode serveur. Il est important de noter que cela pose question en terme de sécurité. En effet, si les utilisateurs partagent un dépôt commun, alors ils peuvent théoriquement récupérer les données des autres utilisateurs. Cela n'est heureusement possible que si l'utilisateur a connaissance du hash de 256 bits correspondant au fichier qu'il souhaite récupérer. Par contre, cela peut fort bien être utilisé intentionnellement par Alice pour partager avec Bob un fichier qu'elle a sauvegardé via Kopia. Il suffit à Alice de transmettre le hash de 256 bits à Bob pour que ce dernier puisse le restaurer au travers de son client Kopia.
Parmi ces trois solutions de sauvegarde, seul Borg ne propose pas de nombreux modes de stockage dont plusieurs dans des environnements cloud qui ne nécessitent pas le déploiement de l'application. C'est sans doute à cause de cette différence que le marché ne propose pas, ou peu, d'offres de stockage pour les sauvegardes basées sur Restic ou Kopia. Il existe quelques services commerciaux proposant le stockage de dépôts de sauvegarde Borg, par exemple rsync.net ou borgbase.com. Ce dernier est d'ailleurs le seul, à ma connaissance, à proposer aussi l'hébergement de sauvegardes Restic. Je n'ai rien trouvé pour Kopia, n'hésitez pas à me corriger en commentaire. Il existe cela dit quelques solutions clé-en-main à base de boîtier NAS grand public comme par exemple QNap pour lequel ces trois applications ont été implémentées.
Pour conclure avec cette série d'articles, je vais résumer ici l'intégralité des tableaux de qualification des trois produits.
| Borg | Kopia | Restic | |
|---|---|---|---|
| Portabilité | - | + | + |
| Options de stockage | - | + | + |
| Options de transport | - | + | + |
| Dépôt multi-client | - | + | + |
| durée des sauvegardes | - | + | - |
| volume réseau | + | + | - |
| gestion de la rétention | + | - | + |
| Durée des restaurations | - | - | + |
| Volume réseau | - | - | + |
| Durée des nettoyages | + | + | - |
| Volume réseau | - | + | + |
| Durée des vérifications | + | - | + |
| Taille du cache local | + | - | - |
| Score final | 5 | 8 | 9 |
Attention à cette notation, vous remarquerez que la couverture fonctionnelle (portabilité, options de stockage et de transport etc.) pèse énormément dans la note finale. Si ces aspects n'ont pas d'importance pour vous, le résultat final s’en trouve largement modifié.
Mon analyse des solutions Borg, Kopia et Restic est désormais terminée. Malheureusement, je ne suis pas plus avancé qu’avant car ces solutions sont relativement équivalentes et ont toutes des aspects séduisants. Je n'ai toujours pas décidé si j'allais remplacer Borg par autre chose et, si oui, par quoi.



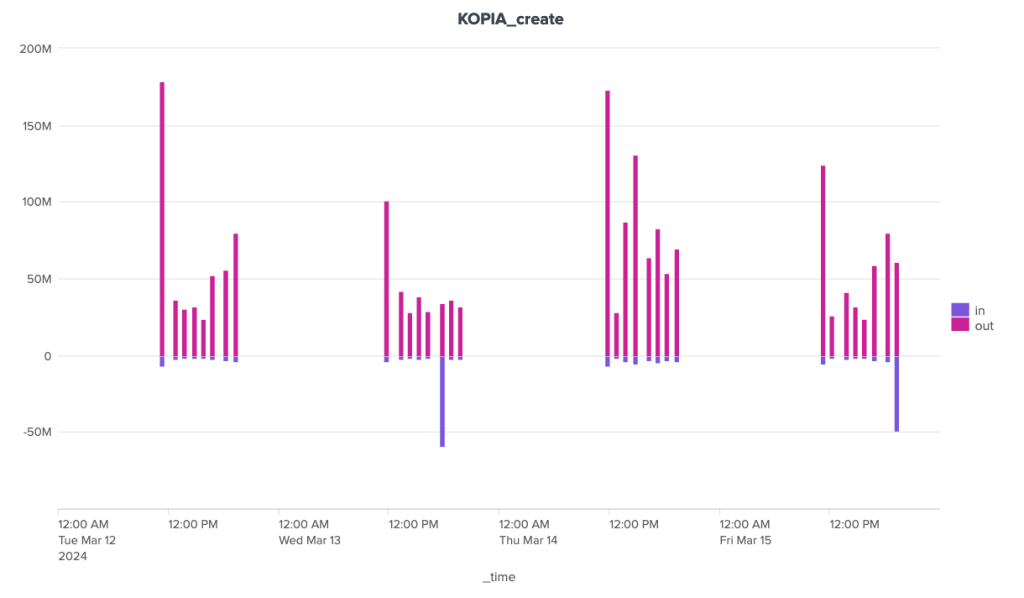
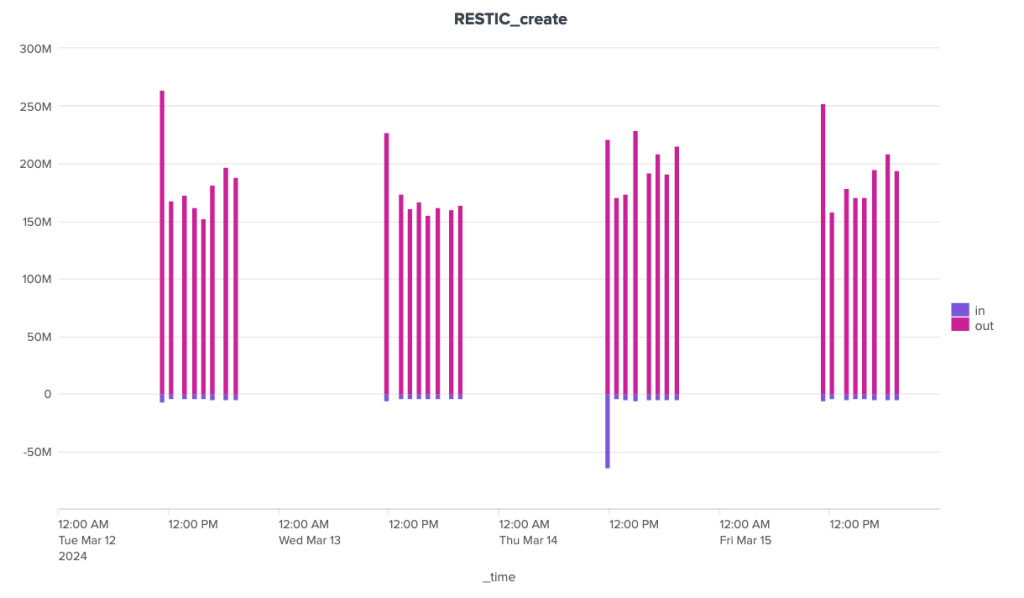
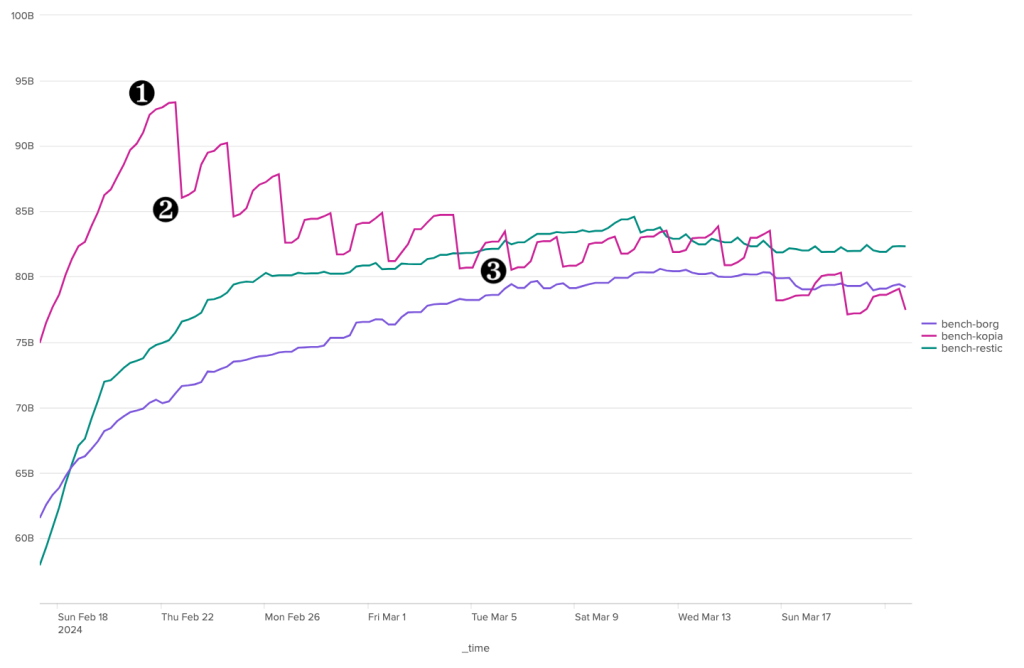
 Borgbackup, ou Borg pour les intimes, est une solution développée en langage python. Elle s'installe plutôt simplement mais ne permet pas la sauvegarde des postes Windows. Sa documentation est relativement exhaustive et son écosystème inclut des solutions d'automatisation et d'interfaces graphiques. Elle évolue régulièrement. Les tests ont été faits avec la version 1.2.7. La branche 1.4 (beta) est disponible et la branche 2 est en cours de développement actif.
 Kopia est une solution codée en GO. La version utilisée ici est la 0.15.0 et le projet est actif. Il s'agit d'un binaire monolithique disponible pour différentes architectures et systèmes d'exploitation. Kopia est compatible Windows et propose une version graphique. Il fonctionne aussi avec de nombreux stockages distants différents comme par exemple les stockages de type S3, Azure blob Storage, Backblaze B2, WebDAV, SFTP, etc. Il n'est pas nécessaire d'installer des composants côté serveur pour utiliser Kopia.
 Restic est aussi codé en GO. La version utilisée ici est la 0.16.4 et le projet est actif. il est disponible pour différentes architectures et systèmes d'exploitation, y compris Windows. L'éventail de solutions de stockage distant supporté par Restic est à peu près similaire à celui de Kopia. Restic propose en plus son propre serveur HTTP haute performance qui implémente l’API REST de Restic. Cela permet, comme dans le cas de Kopia et de Borg, d'assurer une sécurisation des sauvegardes en limitant les droits du client.